
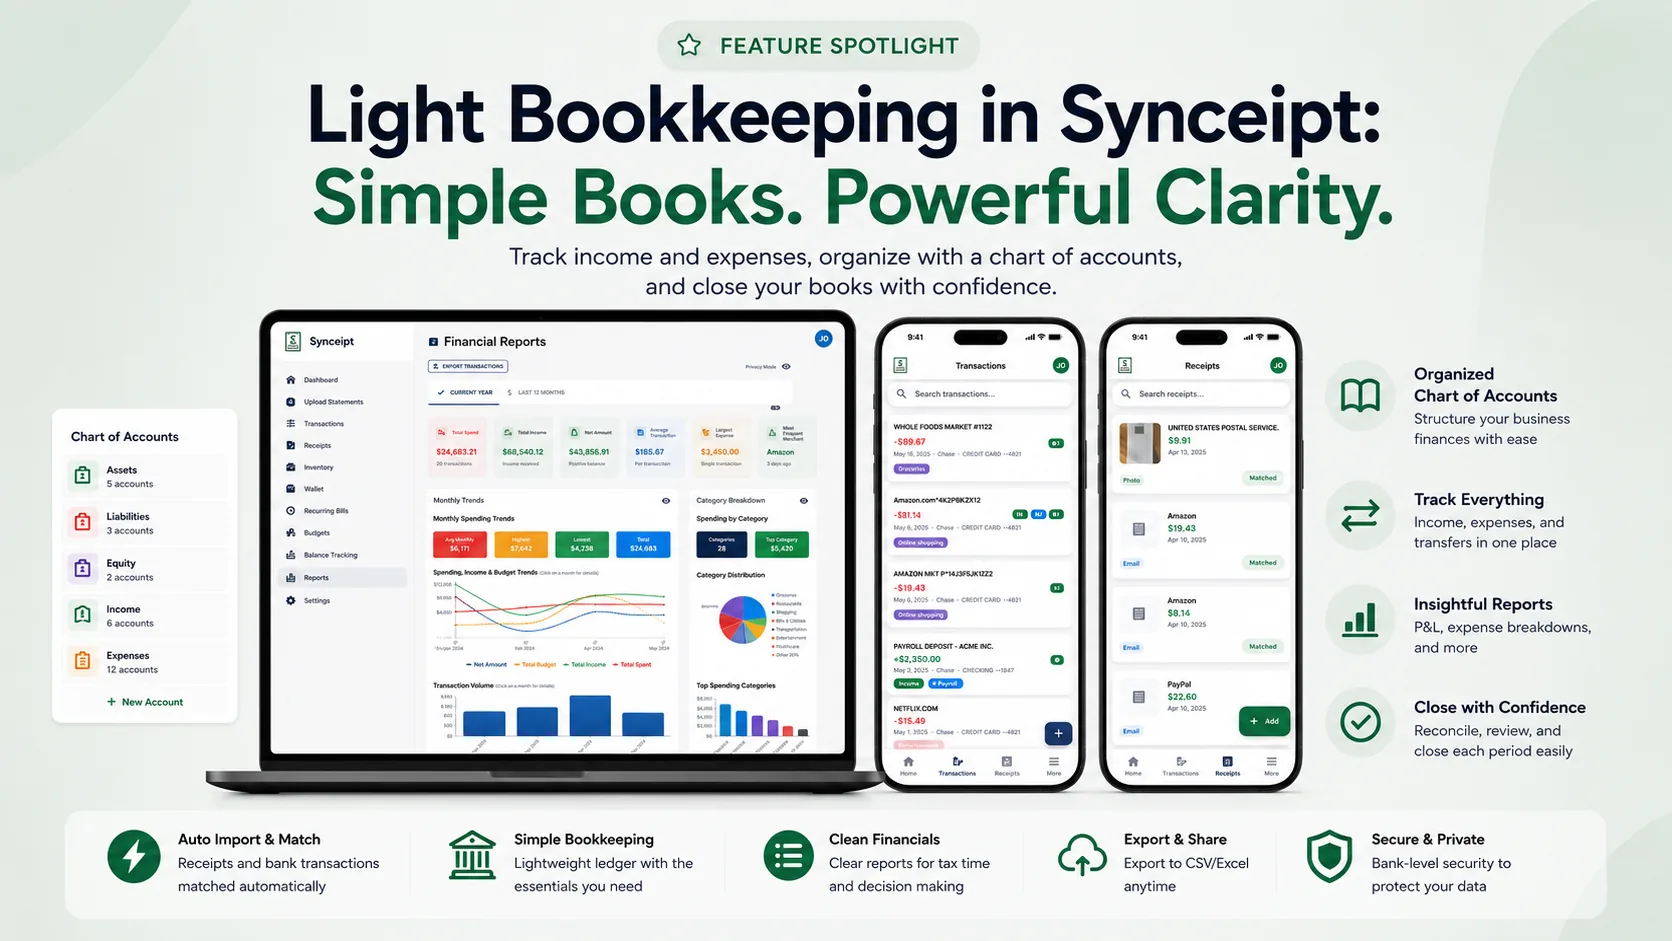
Light Bookkeeping isn't a separate app-within-the-app. There's no "Ledger" tab to go find — it's a set of tools built directly into the Transactions page, the Reports page, and Settings that you already use. If you've been putting off a real bookkeeping habit because it meant learning a whole new piece of software, this guide walks through exactly what changed and how to use each piece, in the order you'd actually use them.
The short version: you review the transactions that came in, split out any batched deposits (a marketplace payout that bundles revenue and fees into one number), tag anything that needs a customer or project label, close the period once it's clean, and export a P&L. None of it requires double-entry bookkeeping knowledge — it's built on top of the receipts and transactions Synceipt already matched for you automatically.
What's Included, and Which Plan You Need
Most of Light Bookkeeping — reviewing and excluding transactions, splitting deposits, closing and reopening periods, the Reviewed-only P&L, and exporting to Excel — is a Pro or Pro Plus feature. Two pieces are quietly available on every plan, including Free, worth knowing about even if you're not ready to upgrade:
- Customer, Project, and Invoice # fields on any transaction — available on every plan
- Custom Categories (your own chart-of-accounts entries) in Settings → Tags — available on every plan
- Review, Exclude/Restore, bulk Mark Reviewed, Split transaction, and the Review filter dropdown — Pro & Pro Plus
- Close Books (period locking and reopening) — Pro & Pro Plus
- "Reviewed only" reports and export — Pro & Pro Plus (the Reports page itself is already Pro/Pro Plus only)
There's no dedicated upgrade banner on the Transactions page itself for these tools — if you're on Free or Regular, the Review dropdown, Close Books button, and bulk-selection checkboxes simply won't appear. If you don't see them, that's why.
This whole workflow doesn't have to be yours to run alone. A Bookkeeper-level Advisor Access grant lets an outside bookkeeper do every step in this guide — review, exclude, split, categorize, and close the books — directly in your account, without you exporting anything to them or making them a full team member. See How to Share Receipts with Your Team, CPA, or Bookkeeper for exactly how Advisor Access works.
Step 1: Review, Exclude, and Restore Transactions
The foundation of Light Bookkeeping is a second status layered on top of matching: a transaction can be Unreviewed, Reviewed, or Excluded, independent of whether it's matched to a receipt. On Pro and Pro Plus, the Transactions page opens with the Review filter already set to Unreviewed, so you land straight on the work that's left to do instead of your entire history.
- The Review filter — a dropdown labeled "Review" in the filter row — lets you switch between All active, Unreviewed, Reviewed, and Excluded.
- To mark a single transaction, open its actions menu (the three dots on the row) and choose Mark as Reviewed. Once reviewed, the same menu item flips to Mark as Unreviewed if you need to undo it.
- To handle several at once, check the boxes on multiple rows — a bar appears above the list with Mark Reviewed, Unreview, and Clear.
- A reviewed transaction gets a small green REVIEWED stamp so you can see its status at a glance without opening the filter.
Excluding is different from deleting, and Synceipt only shows you the option that makes sense for the transaction's source. A manually-entered transaction shows Delete — a real, permanent removal. A transaction that came from a connected bank or a statement upload shows Exclude instead, because Synceipt won't let you delete a record of an actual bank-sourced transaction. Excluding pulls it out of your active review, budgets, and reports, without destroying the record.
Excluded transactions aren't hidden in a separate modal — switch the Review filter to Excluded and they show up right in the same searchable, editable list. From there, the actions menu offers Restore Transaction, which puts it straight back to Unreviewed.
Step 2: Split a Batched Deposit Into Revenue, Fees, and Tax
This is the tool built specifically for marketplace and payment-processor payouts. If you sell on Etsy, eBay, or Poshmark, or take payments through Stripe or PayPal, the deposit that lands in your bank is rarely just your sale price — it's usually your revenue minus a processing fee, sometimes with sales tax bundled in too. Reported as one lump number, that single deposit overstates your income and hides your real costs. Splitting fixes that without you having to do the math by hand.
Splitting only appears on credits — you can't split an expense, since this is specifically for decomposing income, not allocating a purchase across categories (that's what item-level budget categorization already does automatically on the receipt side). Open the actions menu on a deposit and choose Split transaction.
- Add one line per component of the deposit, each with a Kind — Revenue, Fee, Refund, Tax, Reserve, or Other — an Amount, a Category, and an optional Note.
- Revenue counts as income. Fee is a deduction (enter it as a negative amount) and counts as an expense. Tax is money you collected on behalf of someone else — it's excluded from your P&L rather than counted as income.
- The lines must add up exactly to the deposit total. A running total shows Reconciled once they match, or how far off you are if they don't.
- A live P&L preview updates as you add lines, showing exactly what will count as revenue, what's excluded as tax or a reserve/hold, and your net revenue after any refund lines.
Only include fees that were actually deducted from this specific deposit. A separate monthly platform fee that hits your bank as its own charge is already its own transaction — adding it again inside a split would double-count it.
Once saved, a split transaction shows a small numbered chip on the row (hover it to see "Split into N lines") — click it any time to reopen the same editor and review or adjust the lines. Clearing all the lines reverts the transaction back to reporting as one whole amount.
Step 3: Tag Transactions by Customer, Project, or Invoice
If you do work for multiple clients or run more than one side project through the same account, open Edit on a transaction and look for the Customer, Project, and Invoice # fields. These sit alongside your existing tags and notes, and — unlike most of this guide — they're available on every Synceipt plan, not just Pro and Pro Plus.
None of these fields are required, and you can leave any of them blank. They're most useful when you're regularly invoicing more than one customer and want to be able to trace a specific deposit back to the job it paid for later, whether that's for your own records or for an accountant.
Step 4: Build a Chart of Accounts With Custom Categories
Synceipt's built-in categories cover most everyday spending, but a small business or freelancer usually wants a few categories that match how their business actually operates — "Marketplace Fees," "Client Reimbursables," or a specific revenue line. Custom Categories let you add exactly those, and like the fields above, this is available on every plan.
- 1
Go to Settings → Tags
The Tags tab in Settings holds both your regular tags and, below them, the Custom Categories section.
- 2
Add a category
Give it a Name, choose Type — Expense or Income — and, if it's Income, an Income class (Revenue, Other income, Non income, or Transfer). Add an optional COA code (a chart-of-accounts number, like 4000) and a color to make it easy to spot.
- 3
Use it anywhere a category appears
A custom category shows up immediately as a colored chip anywhere you'd pick a category — on a transaction, inside a split line, and in your reports — right alongside the built-in ones.
You can't delete a custom category that's currently assigned to any transaction — Synceipt will ask you to recategorize them first. An unused one deletes immediately.
Step 5: Close (and Reopen) an Accounting Period
Once a month or a quarter is truly done — every transaction reviewed or excluded — closing the period locks it, so a stray edit weeks later can't quietly change numbers you've already filed or reported. This is the Pro/Pro Plus feature with the most guardrails, since it's protecting against real mistakes rather than just organizing a view.
Click Close Books on the Transactions page (it sits in the filter row, next to a small lock icon). This opens a dedicated screen where you set a Start date, an End date, and an optional Label — something like "March 2026" — to help you tell periods apart later.
- As soon as both dates are set, Synceipt checks the range and tells you how many transactions are still unreviewed. If there are any, Close Period stays disabled until you handle them — mark them Reviewed, or Exclude the ones that shouldn't count.
- If the range has no transactions at all, Synceipt still lets you close it, with a note that doing so locks it against future backdated changes.
- Once everything in range is reviewed or excluded, the screen confirms it's ready and Close Period becomes clickable.
After closing, every transaction dated inside that range shows a small lock icon and becomes read-only — its status, category, tags, exclusion state, and matching are all frozen. Trying to edit one shows a clear message that the period is closed. Closed periods are listed on the same screen so you can see everything you've locked so far.
Made a mistake, or need to correct something after closing? Reopening is built into the same screen, not a separate request. Find the period in the list, click its reopen icon, optionally leave a reason, and confirm — the whole range becomes editable again immediately, and the reopen is recorded so there's a clear audit trail of who reopened what and why.
Step 6: Get Your Reviewed-Only P&L
Reports already break down your income and spending, but Light Bookkeeping adds a "Reviewed only" switch right next to the export button. Turn it on and every number on the page — the P&L, the category breakdown, everything — is scoped to only the transactions you've actually reviewed, which is the number you'd want to hand off or file, rather than everything Synceipt has ever synced.
The income summary also splits out Operating income from Other income right under the total, so a one-off refund or a transfer doesn't get lumped in with your actual revenue.
Step 7: Export Clean Books to Excel
From Reports, click Export Transactions to open the export page. This is the same export used across Synceipt, but Light Bookkeeping adds several options specifically for handing something usable to yourself at tax time or to an accountant.
- Reviewed only — export just your reviewed books, same as the report toggle.
- Tab per category — writes one worksheet tab per primary category, with an index tab linking to each, instead of one flat sheet.
- Expand split lines — writes a split transaction as one row per line (Revenue, Fee, Tax, and so on), with a column showing exactly what's counted toward your P&L versus what's excluded.
- Columns to Export — pick exactly which fields go in, including the newer bookkeeping columns: Customer Name, Project Name, Invoice Number, Category Code, Review Status, and Document Link.
- Images (ZIP) — a separate button that downloads a ZIP of the receipt images for whatever you've currently selected, with filenames matching the Document Link column so you can match a row to its receipt.
Pick .xlsx or the older .xls format, review the live preview table before you commit (you can uncheck individual rows to leave them out), and export. The result is a spreadsheet built from transactions you've already reviewed and split, not a raw bank feed you still have to clean up yourself.
A Simple Monthly Routine
Here's roughly how this fits together for someone running a small Etsy shop out of one bank account, once a month:
- 1
Review what came in
Open Transactions — you're already looking at Unreviewed by default. Go through the month's activity and Mark Reviewed as you confirm each one is correct, using the bulk bar to clear out the obvious ones (a recurring rent payment, a known subscription) a few at a time.
- 2
Split the Etsy payouts
Each weekly Etsy deposit bundles item sales, shipping charged to customers, Etsy's fees, and sales tax collected. Open Split transaction on each payout and enter a Revenue line for the sales, a Fee line (negative) for what Etsy took, and a Tax line for the sales tax — the live P&L preview confirms your real revenue before you save.
- 3
Tag anything client-specific
If a deposit was tied to a custom order for a specific buyer worth tracking separately, add their name in the Customer field on that transaction.
- 4
Close the month
Once everything is reviewed or excluded, open Close Books, set the date range to the full month, and close it. Nothing in that range can change by accident afterward.
- 5
Export the P&L
Turn on Reviewed only in Reports and export with Tab per category and Expand split lines turned on — a clean, itemized spreadsheet ready for your own records or an accountant, with no manual cleanup.
Frequently Asked Questions
Do I need a special "Ledger" page to use Light Bookkeeping?
No. There's no separate Ledger or Bookkeeping tab in Synceipt. Everything described in this guide lives inside the Transactions page you already use, plus the Reports and Settings pages. Light Bookkeeping is a set of tools layered onto pages you already know, not a new destination.
Which Synceipt plan do I need for Light Bookkeeping?
Most of it — reviewing and excluding transactions, splitting deposits, closing and reopening accounting periods, the Reviewed-only P&L, and exporting to Excel — requires a Pro or Pro Plus plan. Two pieces are available on every plan, including Free: the Customer/Project/Invoice # fields on a transaction, and Custom Categories in Settings.
What's the difference between Exclude and Delete?
Delete permanently removes a manually-entered transaction. Exclude is for transactions that came from your bank or a statement upload — it removes them from your active review, budgets, and reports without deleting the underlying record, and you can Restore it at any time from the Excluded view. Synceipt shows Delete only on manual entries and Exclude only on bank-sourced ones, so you won't see both options on the same transaction.
Can I split any transaction, or only certain ones?
Only credits — money coming in. Splitting is built for decomposing a batched deposit, like a Stripe, Etsy, or PayPal payout that bundles revenue, a processing fee, and sales tax into one bank line, into its real components. It doesn't appear as an option on expense transactions.
What happens if I try to close a period that still has unreviewed transactions?
Synceipt blocks it. The Close Books screen checks your date range as you type it and tells you exactly how many transactions in that range are still unreviewed. You'll need to mark them Reviewed (or Exclude them) before the Close Period button becomes active.
Can I undo closing a period?
Yes. Reopening is built into the same Close Books screen — the account owner, a Bookkeeper-level advisor working on your books via Advisor Access, or a Synceipt platform admin (for support cases) can reopen any closed period, optionally leaving a reason, and every transaction in that range becomes editable again. The reopen is recorded for audit purposes, and reopened periods stay listed separately so you can see what's been reopened and why.
Does Light Bookkeeping replace QuickBooks or full double-entry accounting?
No, and it's not trying to. There's no payroll, bill pay, balance sheet, or cash flow statement, and it isn't a true double-entry system. It's built to take receipts and transactions you've already matched and turn them into a clean chart of accounts and P&L — for a freelancer or small business that mainly needs deduction-ready books and a tax-ready export, not a full accounting platform. The money-in side is covered separately: Pro and Pro Plus also include invoicing and accounts receivable, which issues invoices and matches customer payments to the deposits that paid them.
Try Light Bookkeeping on Pro or Pro Plus
Review, split, close the books, and export a clean P&L — built directly on the receipts and transactions Synceipt already matched for you automatically.